EDUCATING LEADERS IN PHARMACY AND PHARMACEUTICAL SCIENCES SINCE 1886
SPPS Shared Student Calendars
The SPPS Shared Student Calendars help students stay informed about exams, course schedules, deadlines, and school events in a centralized location. They are view-only calendars designed to support organization and planning.
On This Page:
About SPPS Shared Student Calendars
What they include:
- Required and elective courses
- Exams
- Important dates and academic deadlines
- UB calendar (add/drop, breaks)
- Pharmacy Series, OSSE and EE-related events
Important:
- Calendars are available view-only.
- Must be added through Outlook.com (web version).
- Always confirm exam dates and deadlines with your course syllabus and instructor.
Adding the Calendars
Important: Use Outlook.com (web version)
Add the calendar using Outlook.com (not the desktop or mobile app). Afterward, the calendars will show up on your computer and phone automatically.
Step 1: Log Into Outlook.com with buffalo.edu account
- Go to Outlook.com
- Log into your @buffalo.edu account
- Verify you are signed into your UB email (check your initials in the top right). If not, click “Sign Out”, then log back in using your UB email address and password.
Step 2: Open Calendar View
Click the Calendar icon in the left navigation panel (refer to Figure 1).

Step 3: Click “Add Calendar”
Select Add Calendar on the left side (refer to Figure 2).

Step 4: Select “Add from Directory”
Click the “Add from directory” link in the left column (refer to Figure 3). If you do not see this option, click the user initials or picture in the top, right corner of the page and verify you are logged into your @buffalo.edu account. If not, click “Sign Out”, then log back in using your UB email address and password.

Step 5: Select Your UB Account from the Dropdown
Under “Please select an account to search from,” click the drop down box and select your UB email account (refer to Figure 4).

Step 6: Search for Your Calendar "SPPS"
Search for the following calendar names. The calendar should auto-populate as you type (refer to Figure 5).
a. SPPS PharmD P1 Students
b. SPPS PharmD P2 Students
c. SPPS PharmD P3 Students
d. SPPS PharmD P4 Students
e. SPPS PHC Undergraduate
f. SPPS PHC Graduate
g. SPPS CTT Graduate

Step 7: Click “Add”
Click the “Add” button (refer to Figure 6). Leave as "Other calendars."
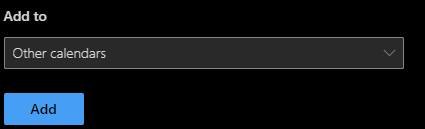
Figure 6
Step 8: Repeat as Needed
Repeat steps six and seven to add additional calendars.
Once the calendars have been added via Outlook.com, they should appear automatically in your Outlook Desktop (Figure 7) or Outlook Mobile apps. Calendars can be toggled on/off to reduce clutter.

FAQs
No. Calendars are view-only. If you find a correction, email pharm-advise@buffalo.edu.
No. Only Outlook platforms are supported.
You are likely not logged into your @buffalo.edu account.
Always follow your course syllabus and instructor communication. Contact pharm-advise@buffalo.edu for discrepencies.
Yes. Calendars can be toggled on/off in your calendar list.
Questions or Corrections?
Email pharm-advise@buffalo.edu.